23 Mini Bat Decor Ideas for a Spooky Shelf Statement
Your shelf doesn’t need another oversized pumpkin to feel ready for Halloween. Sometimes, a few tiny wings make the strongest statement.
These 23 mini bat decor ideas help you add spooky details without crowding the books, candles, and everyday pieces already on display. From folded paper swarms to miniature wreaths, each setup offers a specific way to bring Halloween charm into a small space.
Small decorations can disappear against dark backgrounds or get hidden behind taller objects. That’s why these ideas include practical guidance on contrast, spacing, and placement. Whether you’re decorating one floating shelf or a whole bookcase, you’ll find approachable projects with clear instructions. Start with the materials you have, then choose a display that suits your home.
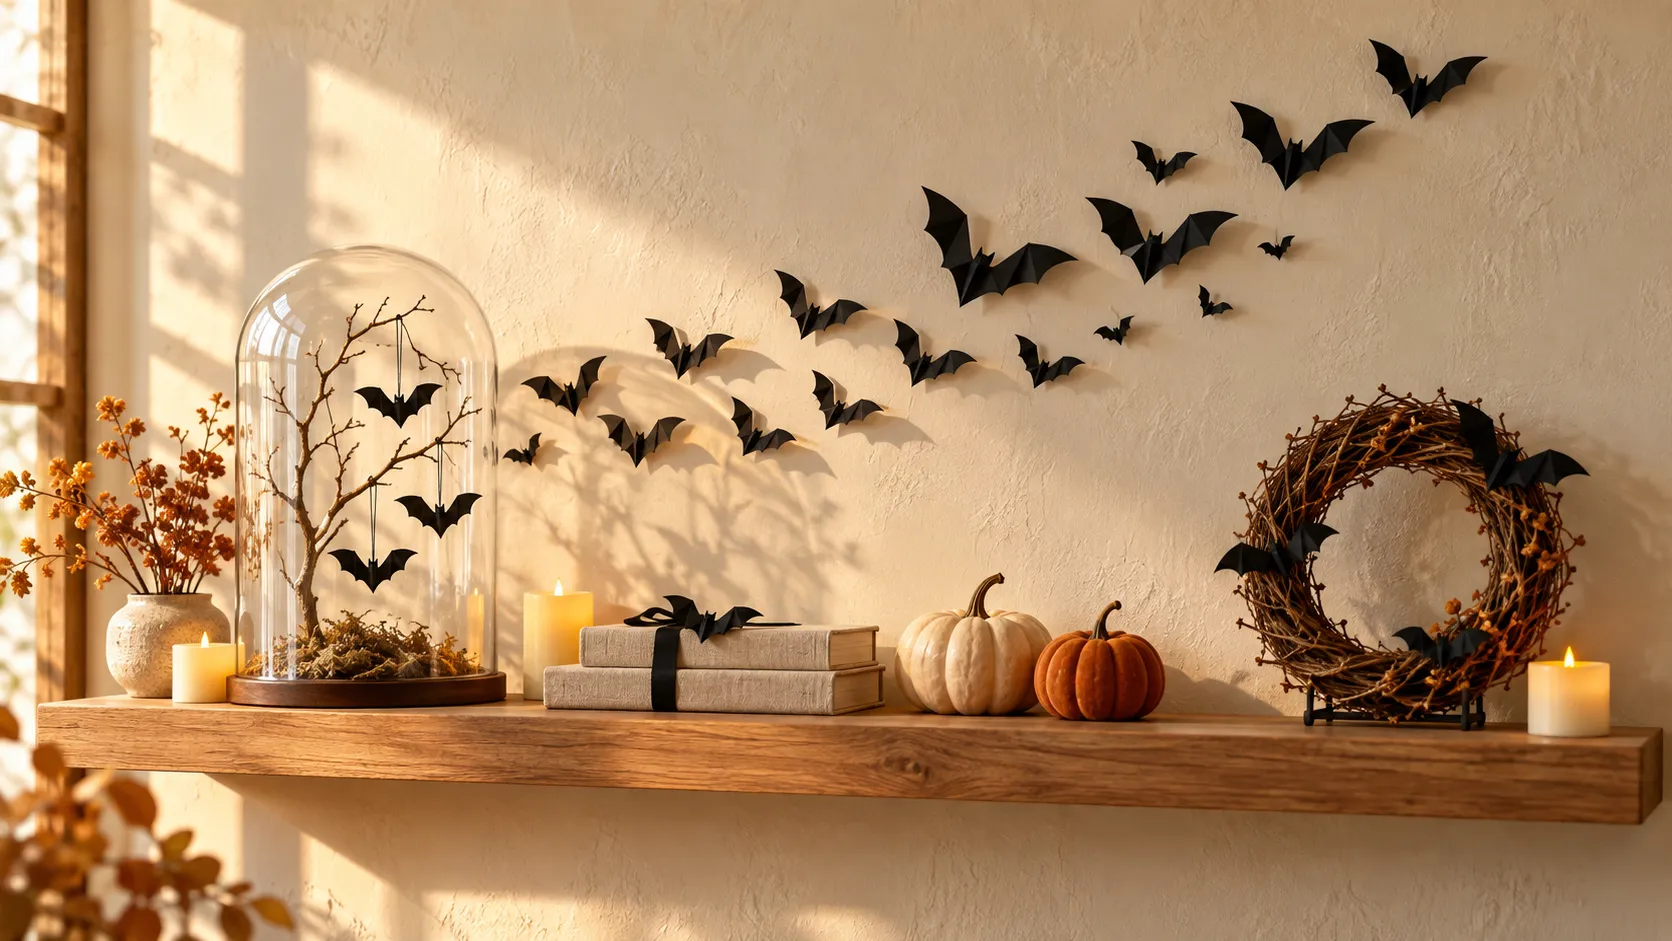
Paper Bat Shelf Swarm

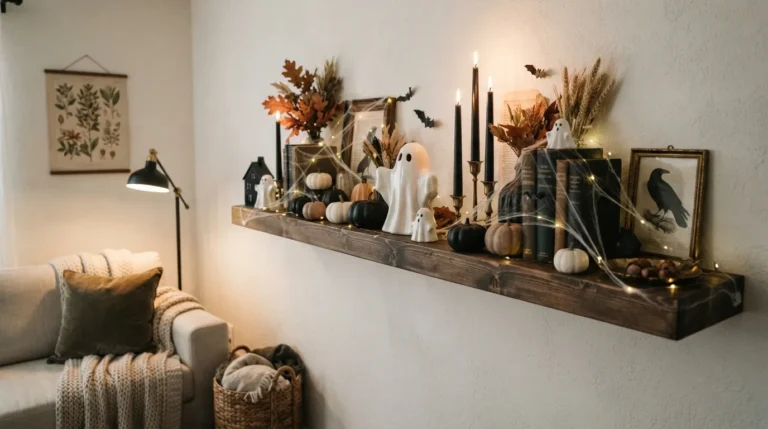
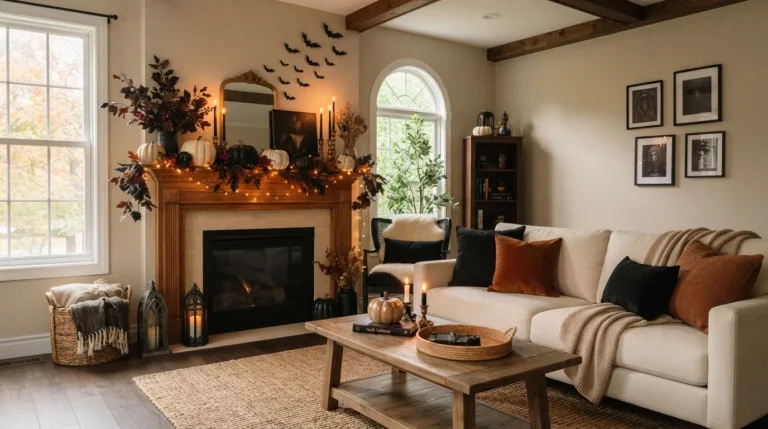
A tiny paper swarm gives an ordinary shelf a focal point without taking up display space. Cut seven to nine bats from black cardstock, keeping each about two inches wide. Fold their wings slightly forward, then arrange them diagonally from one shelf corner toward the wall above.
For balanced mini bat decor, cluster the smallest shapes near the shelf and space the larger ones farther apart. Leave some bare wall between wings so each silhouette stays readable. Test removable adhesive in a hidden spot first, since even temporary products can lift delicate paint.
Cloche Bat Branches
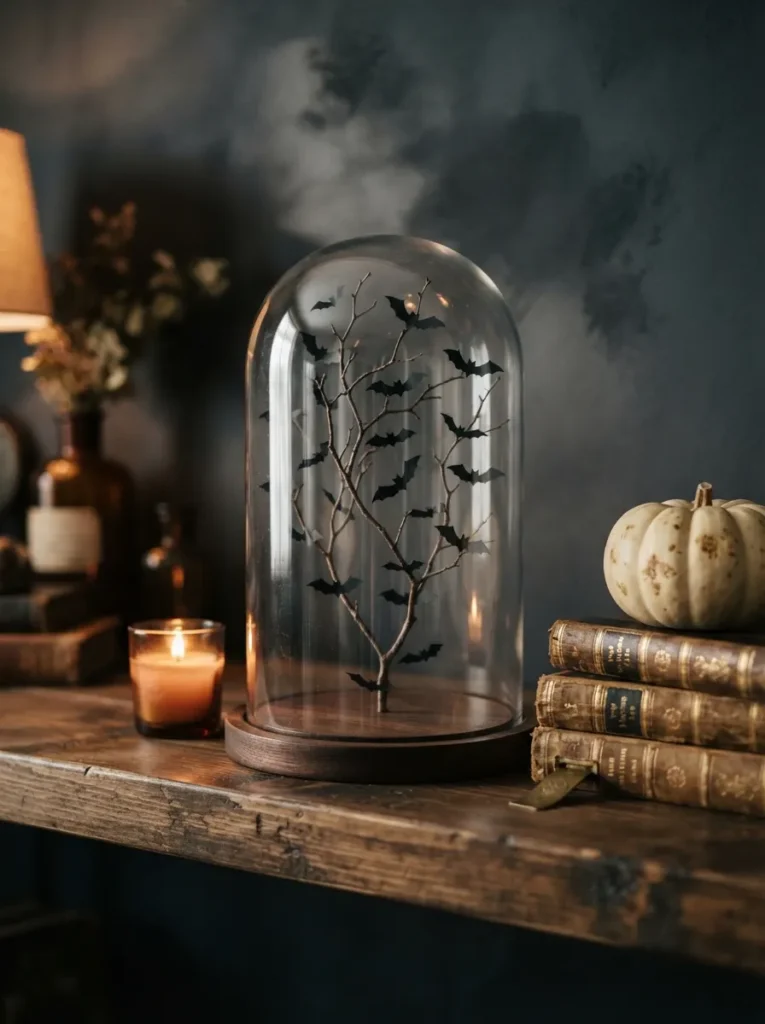
- Give tiny bats their own display case with a glass cloche and a single branching twig. Choose a twig short enough to leave clearance beneath the glass.
- Anchor the twig in a small piece of floral clay on a protective saucer. Cover the base with a thin layer of dried moss.
- Attach three to five cardstock bats with small dots of craft glue. Face their wings in slightly different directions so the arrangement has depth.
- Lower the cloche slowly, checking that no wings touch the glass. Keep the surrounding shelf accessories lower than the dome so its outline stays visible.
The glass creates a clear boundary around small details, helping them stand out on a busy bookcase. Repeat one nearby color inside the display, such as an ivory base beside cream book spines. Dust the dome regularly, because fingerprints become especially noticeable when a lamp sits alongside it.
Bat Book Stack
Quick Tip:
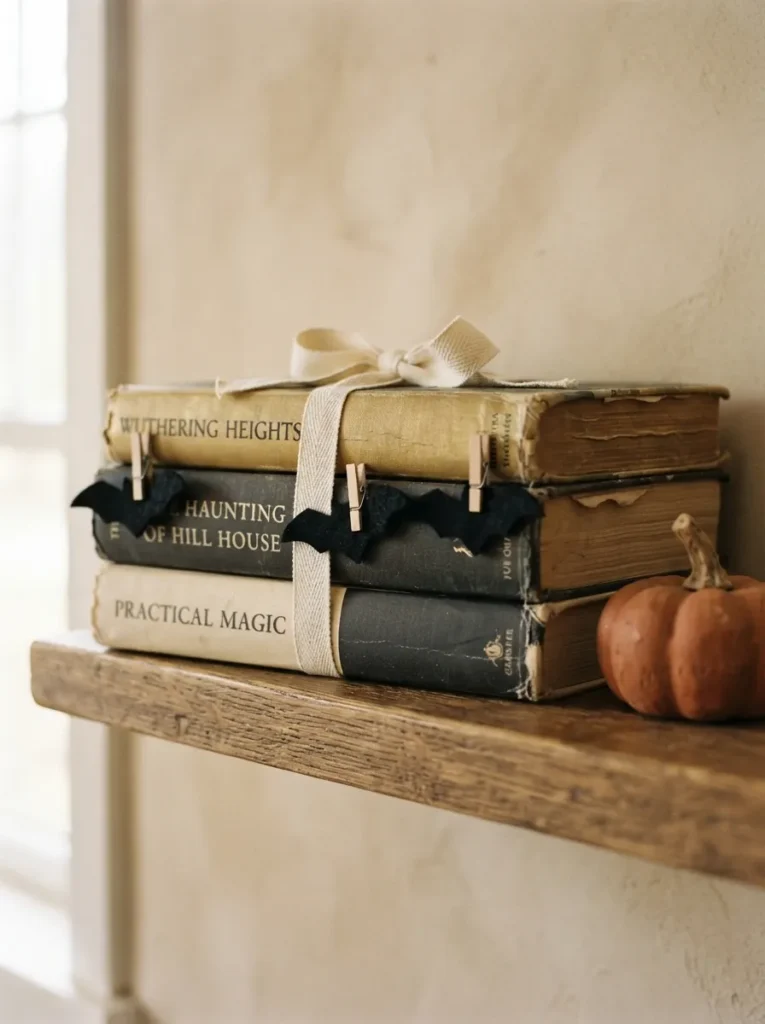
Let a ribbon carry the bats so your book covers stay untouched. Wrap cotton ribbon around two or three stacked books, tie it underneath, and attach tiny felt bats to the ribbon with miniature clothespins.
Horizontal books give small decorations a raised platform, making their shapes easier to see from across the room. Choose plain spines so the bat outlines remain the focus. Keep the clips along the front ribbon, and leave frequently read books outside the stack for convenient daily access.
Also Explore : 24 Mini Witch Decor Ideas for an Enchanting Shelf Look
Moonlit Bat Backdrop

BEFORE: Tiny black bats disappear against a dark shelf backing. Their wing shapes become difficult to distinguish, especially beside dark books or accessories.
AFTER: A pale gold cardstock moon gives each silhouette a clear outline. Five small bats arranged across its face create a focused display without filling the entire shelf.
Cut a moon slightly narrower than the shelf opening, then secure it upright in a small plate stand. Attach bats with foam adhesive squares for shallow shadows. A matte gold finish keeps reflections gentle, while a nearby battery candle adds warmth without an open flame beside the paper.
Hanging Bat Garland
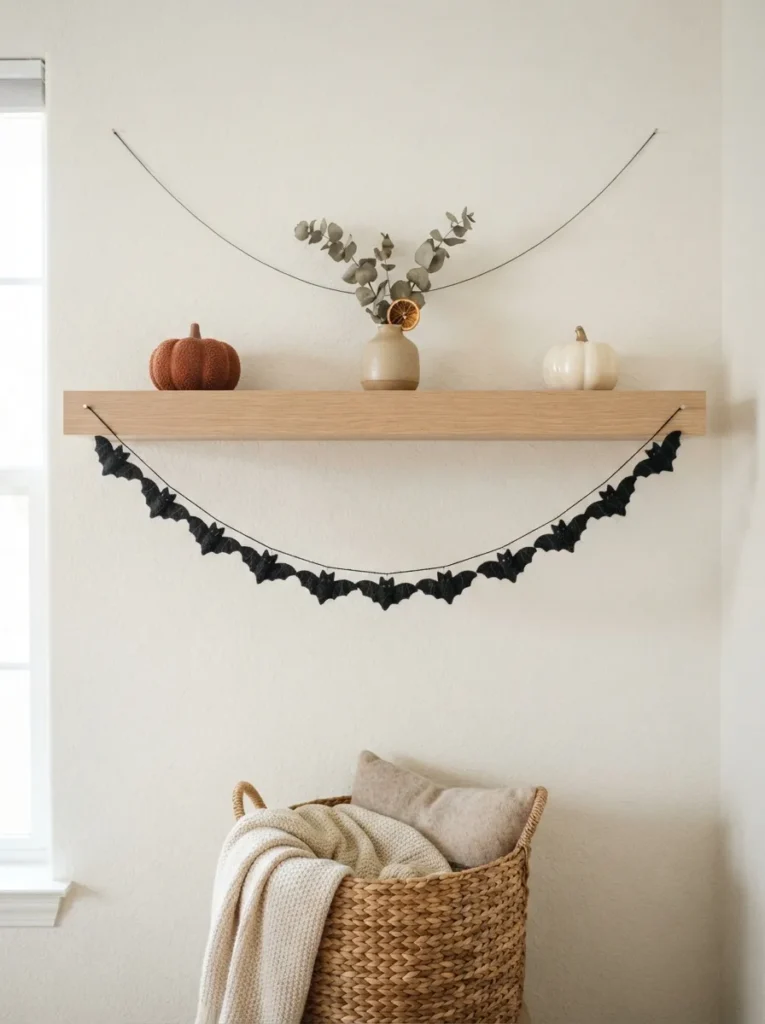
- Give the shelf edge a spooky detail by measuring a length of thread slightly longer than the shelf. Allow enough extra thread at both ends for tying.
- Cut five to seven small bats from stiff felt. Keep their wings broad enough to remain recognizable from a few feet away.
- Thread a needle through two points near each bat’s upper body. This helps the shapes face forward instead of spinning sideways.
- Tie the garland to removable hooks rated for the shelf surface. Adjust the thread into a shallow curve and distribute the bats evenly.
The empty area beneath a shelf becomes part of the display, leaving the top available for everyday objects. Keep the lowest bat above anything stored below so the garland stays clear of daily traffic. On a short shelf, fewer shapes with wider gaps will read more clearly than a crowded row.
Pumpkin Bat Perches
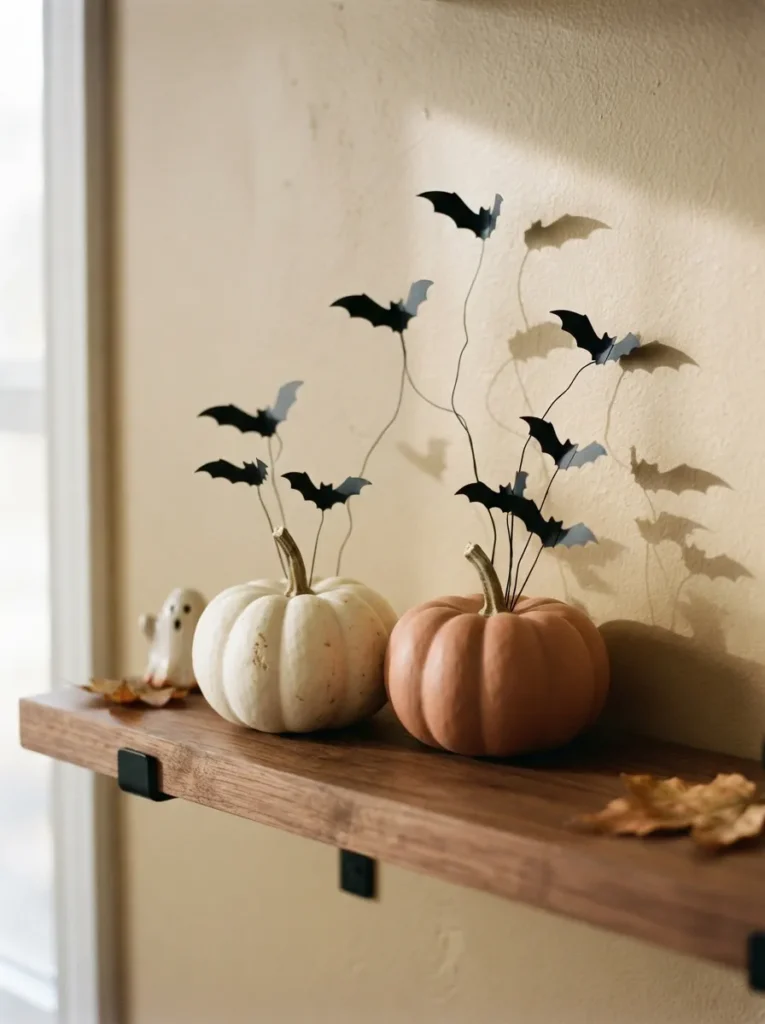
Small pumpkins give tiny bats a sturdy visual anchor, but the base you choose changes how the arrangement holds together.
| Detail | Real Mini Pumpkin | Foam Mini Pumpkin |
| Stem attachment | Tie bat wires around the existing stem | Insert bat wires into the foam |
| Surface character | Natural ridges and varied coloring | Consistent shape and painted finish |
| Seasonal storage | Remove decorations and check for soft spots | Store the complete display in a rigid box |
| Best placement | Protective saucer away from heat | Stable shelf spot away from heat sources |
Keep each bat close to the pumpkin rather than extending the wire into a tall spray. Short stems look more proportional and wobble less when someone passes the shelf. Bend exposed wire tips into closed loops, and position the silhouettes against a pale background so their wings remain distinct.
Framed Bat Silhouettes

Give three tiny bats room to stand out inside a single shadow box.
DO
- Choose a deep frame that leaves space between the wings and glass.
- Arrange three bats vertically on a removable cardstock backing.
- Use pale linen or textured cream paper behind black silhouettes.
- Secure the frame on a stable shelf with suitable anti-slip pads.
DON’T
- Flatten folded wings against the glass.
- Fill every gap with extra Halloween embellishments.
- Glue bats directly onto a valuable photograph or original artwork.
- Lean an unsecured frame over the shelf edge.
A frame gathers small shapes into one readable arrangement, which helps a narrow shelf feel organized. Match the backing to nearby fabrics for a connected look, or use white paper for stronger contrast. Before closing the frame, stand it upright to check that every bat stays in place.
Bat Specimen Jars

Tiny jars turn separate bat cutouts into a miniature cabinet display.
Materials: Clear jars, cork lids, cardstock bats, fine thread, and craft glue.
Time: About 20 minutes, plus glue drying time.
Skill Level: Beginner, with small scissors helpful for wing details.
Best For: Shallow shelves where larger Halloween ornaments feel crowded.
Suspend each bat from thread glued to the underside of its cork, allowing the wings to hang freely inside the jar. Vary the thread lengths slightly across the group. Skip loose filler at the bottom so the silhouettes remain visible, and choose jars with openings wide enough for easy assembly.
Bat Candle Pedestals
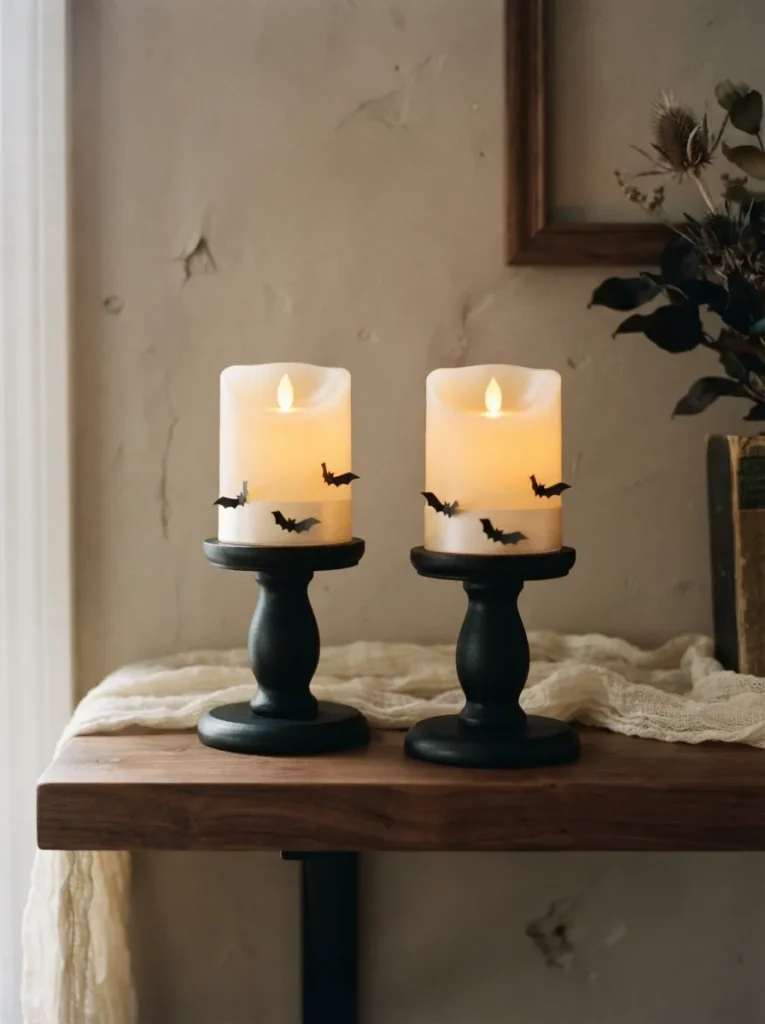
Small bats look especially striking beneath the soft glow of ivory candles. Set two battery-operated pillars on low pedestals of different heights, then wrap cream ribbon around each pedestal base. Attach a pair of black cardstock bats to each ribbon, keeping their wings clear of the shelf surface.
The repeated colors connect both candles, while the staggered heights prevent the display from looking flat. Leave enough room to reach each candle’s switch without disturbing the bats. Use battery candles for this paper-and-ribbon arrangement, and choose broad pedestal tops that fully support the candle bases.
Bat Teacup Roost
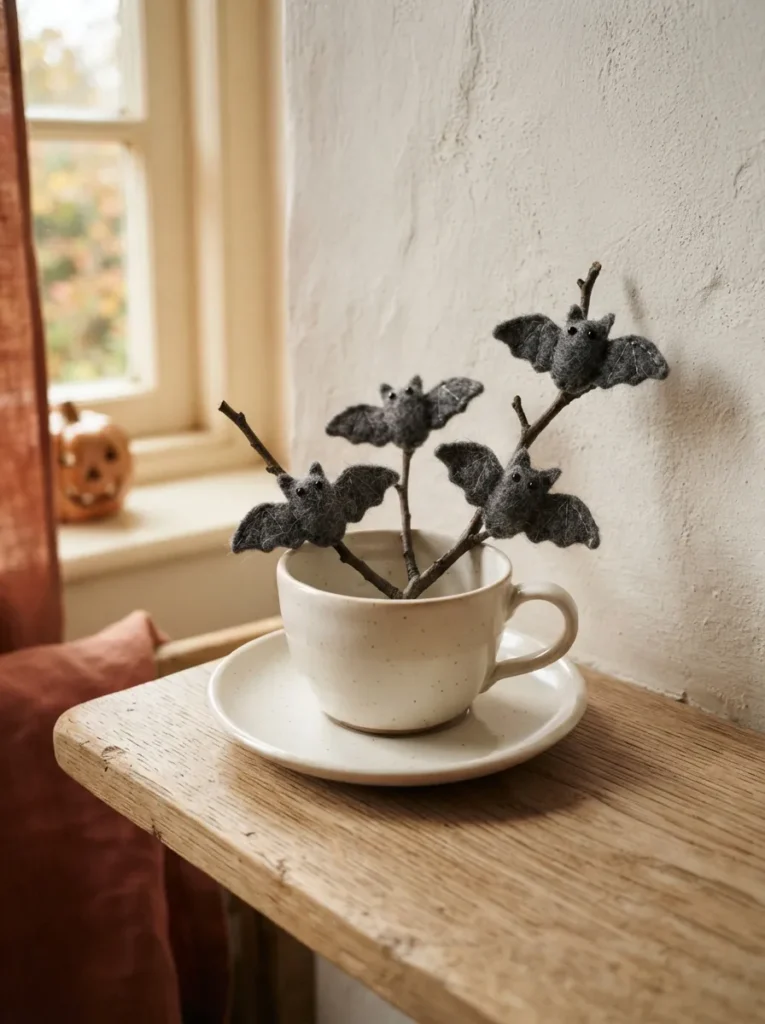
- Turn a spare teacup into a tiny bat roost with one short, lightweight twig. Choose a wide cup with a stable base.
- Place reusable floral clay inside a small protective insert, then press the twig into it. Keep the branches centered above the cup.
- Glue four felt bats onto separate branch tips. Angle their wings outward so the shapes remain distinct.
- Cover the insert with a circle of brown felt cut to fit around the twig. Set the cup on its saucer to give the arrangement a defined footprint.
The familiar cup softens the dark silhouettes, making this setup suit cottage shelves and kitchen displays. Keep the twig shorter than the combined height of the cup and saucer to limit top-heaviness. A chipped decorative cup can work here, provided its base and handle remain structurally sound.
Accordion Bat Screen

Quick Tip:
Make a freestanding backdrop from one folded sheet of heavy cardstock. Keep the folds equal in width, then attach each tiny bat within a panel so its wings do not cross a crease.
An accordion screen adds height without attaching decorations to the wall, making mini bat decor easier to rearrange. Start with three or five panels and open the folds enough for the screen to stand securely. Keep it behind heavier accessories, with space between the paper and any lighting.
Bat Mirror Corner
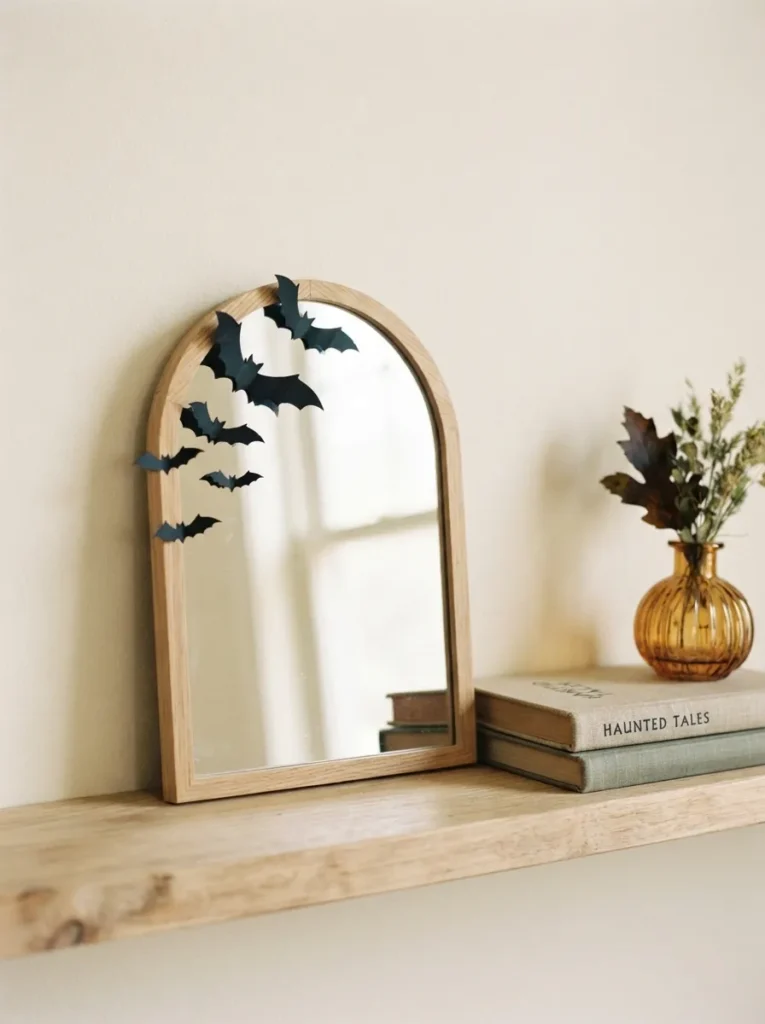
BEFORE: Small ornaments scattered across a mirrored shelf can look busier because their reflections repeat every detail. Bats placed along the bottom edge may disappear behind other accessories.
AFTER: A compact cluster at one upper corner keeps the silhouettes visible. Most of the mirror remains clear, giving the shelf a lighter appearance.
Cut bats in two sizes and arrange them on the frame before securing them with a surface-compatible removable adhesive. Keep the cluster within easy reach for removal. Check the view from your usual seat, since reflected clutter can compete with the shapes even when the shelf itself looks tidy.
Bat Hoop Stand

- Frame a tiny flying trio inside a wooden embroidery hoop for a shelf accent with open space. Choose a hoop about five inches wide.
- Stretch ivory tulle between the rings and tighten the screw. Trim the excess fabric neatly behind the outer ring.
- Cut three felt bats and attach them to the tulle with small stitches through their bodies. Leave the wings loose for slight dimension.
- Seat the hoop in a grooved display base that fits its thickness. Position the screw at the top and check that the ring stays upright.
The circular outline gives the bats a clear boundary without the visual weight of a solid frame. Ivory tulle nearly disappears against a pale wall, emphasizing the silhouettes. Keep the hoop away from crowded book spines, where background patterns can show through the mesh and make the shapes harder to read.
Bat Tile Trio

A row of three bat tiles creates a crisp pattern, with the surface finish setting the mood.
| Detail | Painted Wooden Squares | Ceramic Tiles |
| Visual effect | Soft matte finish with subtle grain | Smooth surface with sharper reflections |
| Bat application | Stencil with paint after the base coat dries | Apply adhesive vinyl to a clean, dry surface |
| Display support | Lightweight easels sized to each square | Sturdy easels rated for the tile weight |
| Storage needs | Separate painted faces with tissue | Cushion each tile to protect edges |
Keep every bat roughly the same size and center each silhouette before attaching or painting it. Equal spacing makes the trio feel intentional, even with inexpensive materials. For a narrow shelf, place the tiles close together on separate easels, leaving enough depth for every support foot to sit fully on the surface.
Bat Moss Terrarium

Bring the bats down into a miniature woodland scene with a shallow, open bowl.
DO
- Use preserved craft moss for a display that needs no watering.
- Anchor a short branch in floral clay before covering the base.
- Attach three tiny bats above the moss where their wings remain visible.
- Leave part of the glass clear so the interior is easy to see.
DON’T
- Mix paper bats with damp soil or regularly misted plants.
- Fill the bowl so densely that every texture overlaps.
- Let branches extend far beyond the bowl’s footprint.
- Place preserved moss in direct sun, where its color may fade.
The low bowl suits shelves with limited space above them, while moss gives black silhouettes a softer setting. Pale stones beneath the branch improve contrast without adding another strong color. Treat this as a dry decorative arrangement, and lift dust gently with a soft brush instead of spraying the contents.
Bat Photo Holders

Let tiny bats float above the shelf on holders you can reuse after Halloween.
Materials: Small wire photo holders, black cardstock, scissors, and paper scraps.
Time: About 15 minutes for three cutouts.
Skill Level: Beginner, with no glue required.
Best For: Small shelves that need height without bulky ornaments.
Slide each bat’s body into a clip, keeping its wings free of the metal. Choose holders with weighted bases, and test whether the clips leave marks on scrap paper first. A loose triangular arrangement gives the group depth while allowing you to remove individual bats without disturbing nearby accessories.
Haunted House Rooftops
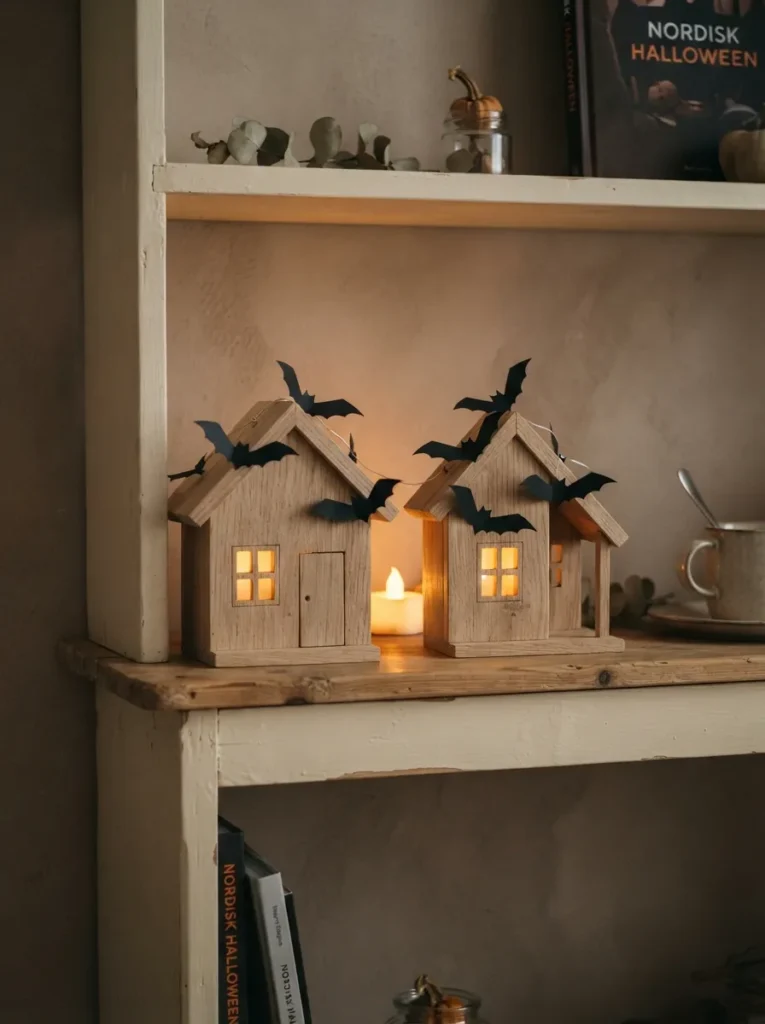
A few rooftop bats give plain wooden houses a Halloween look while keeping their simple shapes visible. Choose two small houses with different roof heights, then cut bats narrower than each roof. Place one at a peak and another near an eave, leaving doors and windows uncovered.
Attach the cutouts with small loops of removable tape tested on the finish first. Angle one bat slightly upward to break the straight roofline. A battery tealight behind the houses can add a gentle background glow; keep its casing clear of paper and follow the light’s placement instructions.
Painted Bat Pebbles

- Make each pebble a tiny canvas by choosing smooth stones with one broad, flat face. Wash them and let them dry completely before painting.
- Sketch a simple bat with a small oval body and two broad wings. Skip tiny facial features that become difficult to read at this scale.
- Fill the silhouette with black acrylic paint using a fine brush. Allow the first coat to dry before correcting uneven edges.
- Arrange four or five finished stones in a shallow dish with their painted faces upward. Leave gaps so the silhouettes stay separate.
The dish gathers loose pieces into a display you can move while dusting. Choose stones large enough for recognizable wings, but keep their heights similar so none hide behind another. For a coordinated shelf, repeat the dish’s color in one nearby accessory, such as a small pumpkin or vase.
Bat Drawer Pulls

Quick Tip:
Give a miniature drawer cabinet a seasonal detail with bats tied beneath its knobs. Keep each ribbon loop short enough that the felt stays clear of drawer seams and does not catch when opened.
Cut a small slit near the top of each felt bat and thread narrow ribbon through it. Tie the ribbon around the knob stem, then test the drawer before finishing the bow. Decorate alternating drawers to keep the cabinet readable and leave frequently used pulls comfortable to grasp.
Bat Shelf Risers
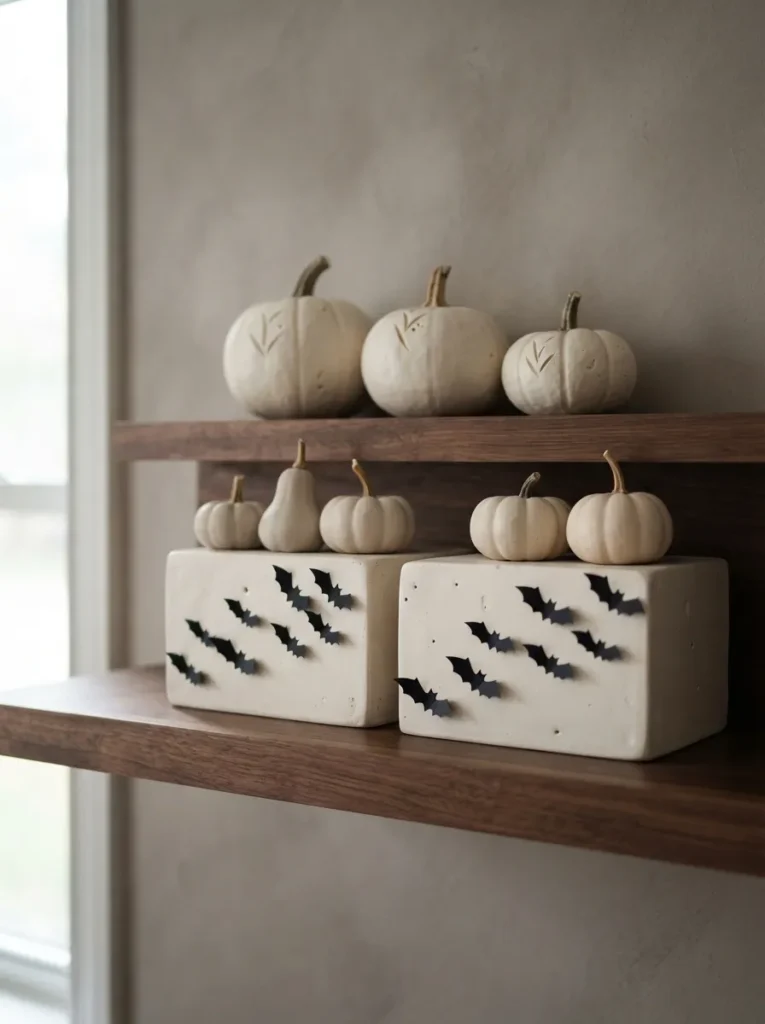
BEFORE: Tiny bats lying flat between ornaments are easy to overlook. Taller accessories block their wings, leaving the shelf without a clear repeating detail.
AFTER: Bats attached to the front of small risers face directly into the room. The raised platforms also separate nearby ornaments by height, making the arrangement easier to read.
Choose risers with solid front panels wide enough for two small silhouettes. Secure the bats with removable adhesive suited to the finish, keeping every wing inside the panel edges. Place lightweight ornaments on top within the manufacturer’s load limit, and leave enough shelf depth to support each riser completely.
Bat Spool Stands
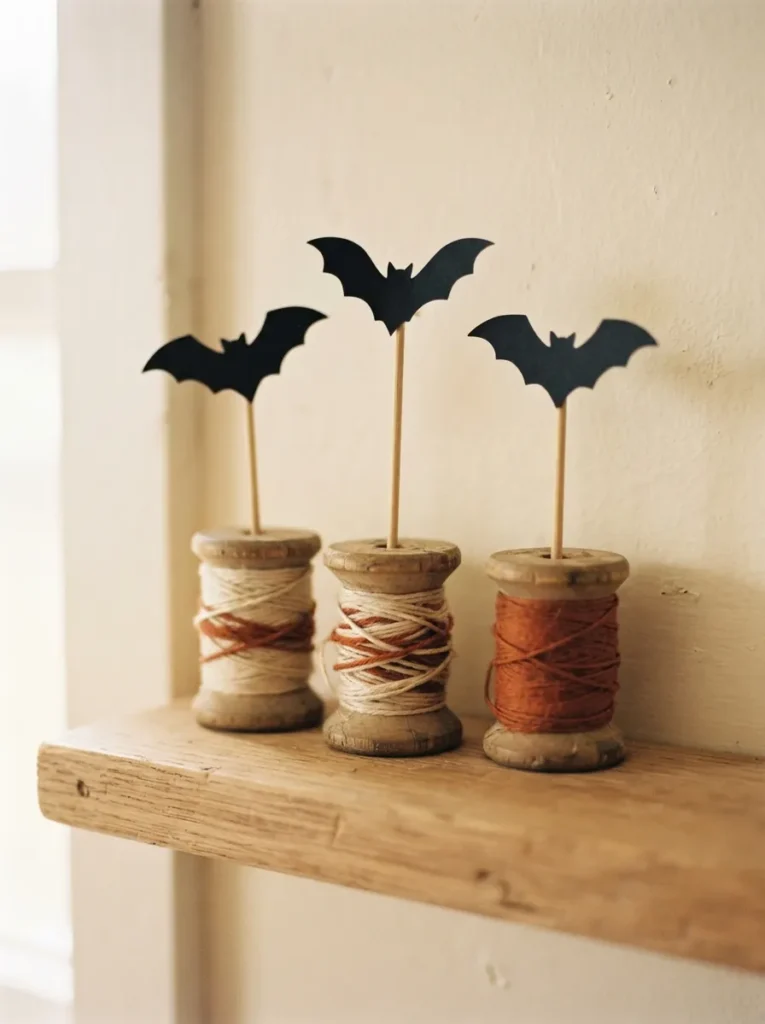
- Give leftover thread spools a second purpose as tiny bat stands. Choose three broad wooden spools with flat bases and open center holes.
- Cut lightweight craft dowels to slightly different lengths, keeping each exposed stem short. Check that the dowels fit the spool holes before assembling.
- Sandwich the top of each dowel between two matching cardstock bat cutouts. Glue the paper layers together and let them dry flat.
- Insert the dowels into the spools, securing loose fits with a small amount of craft glue. Space the finished stands so their wings do not overlap.
Cream thread helps the black shapes stand out, while one rust spool adds a small autumn accent. Keep the tallest bat at the back and the shorter pair forward. These lightweight pieces work best on a quiet shelf where opening doors or passing sleeves will not knock them over.
Bat Cubby Backing
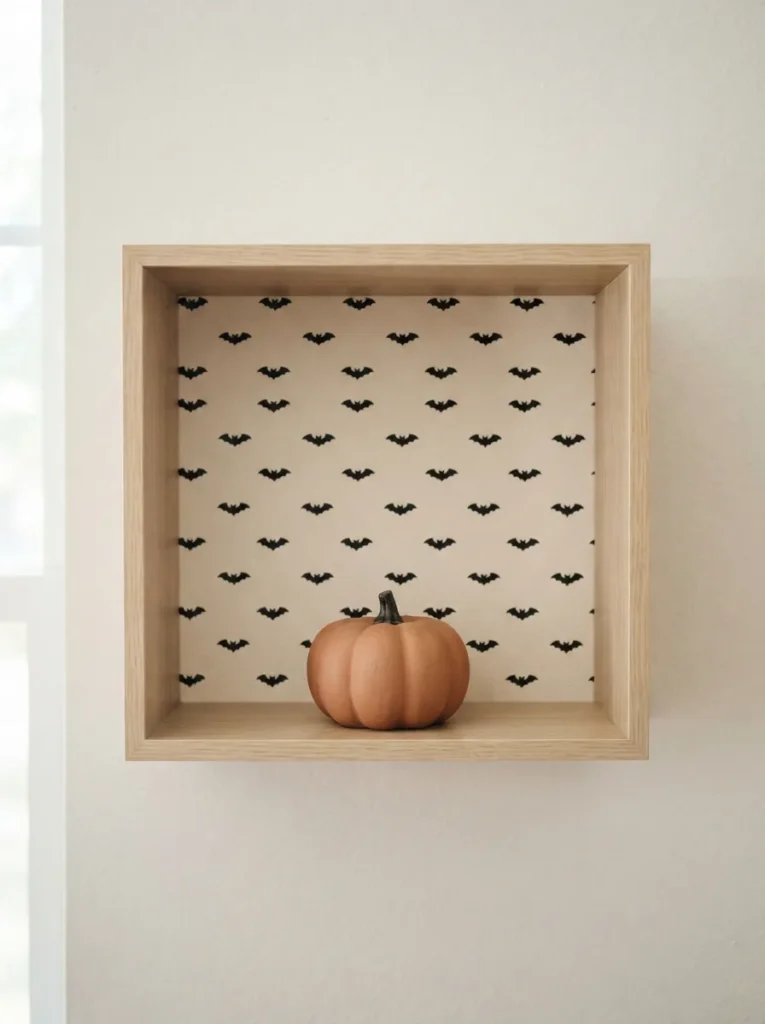
A patterned cubby backing puts tiny bats on display while leaving the shelf floor available.
| Detail | Hand-Stamped Bats | Paper Bat Cutouts |
| Surface effect | Flat pattern with slight ink variations | Raised edges with subtle shadows |
| Spacing method | Mark a light pencil grid before stamping | Arrange loose shapes before gluing |
| Useful materials | Small bat stamp, ink pad, cardstock | Scissors, black paper, glue, cardstock |
| Storage | Store flat once the ink dries | Protect raised details between rigid sheets |
Measure the cubby and trim heavy cardstock slightly smaller than its back panel. Create your pattern before sliding the sheet into place, securing it with surface-compatible removable tabs if needed. Keep accessories low and simple so the repeated bats remain visible above them. Store the backing flat after Halloween.
Bat Mini Wreath

Finish a small shelf vignette with a twig wreath scaled to its tiny winged visitors.
DO
- Choose a wreath small enough to leave visible space above and beside it.
- Cut felt bats in two sizes for a varied cluster.
- Tie bats onto the twigs with fine black thread through their bodies.
- Support the wreath in a plate stand deep enough to hold its thickness.
DON’T
- Cover the entire ring with overlapping wings.
- Force a thick wreath into a shallow, unstable stand.
- Let long ribbon tails trail over the shelf edge.
- Surround the wreath with equally tall accessories that hide its outline.
The open center gives mini bat decor breathing room, especially on shelves already holding books and ceramics. Cluster most bats along one lower side, then place a single smaller bat opposite for balance. Before displaying it, gently nudge the stand to check that the wreath will not roll forward.
CONCLUSION
A spooky shelf starts with a few thoughtful details: clear silhouettes, varied heights, and enough open space for each piece to stand out. These mini bat decor ideas give you plenty of ways to work with your existing shelves, favorite colors, and craft supplies.
Choose one project to try first, whether that’s a paper swarm, a framed trio, or a tiny wreath. Adjust the spacing before adding anything else. Save this post on Pinterest so your favorite ideas are easy to find, and share it with a friend who enjoys Halloween decorating. Pick your bats and make that little shelf your own.