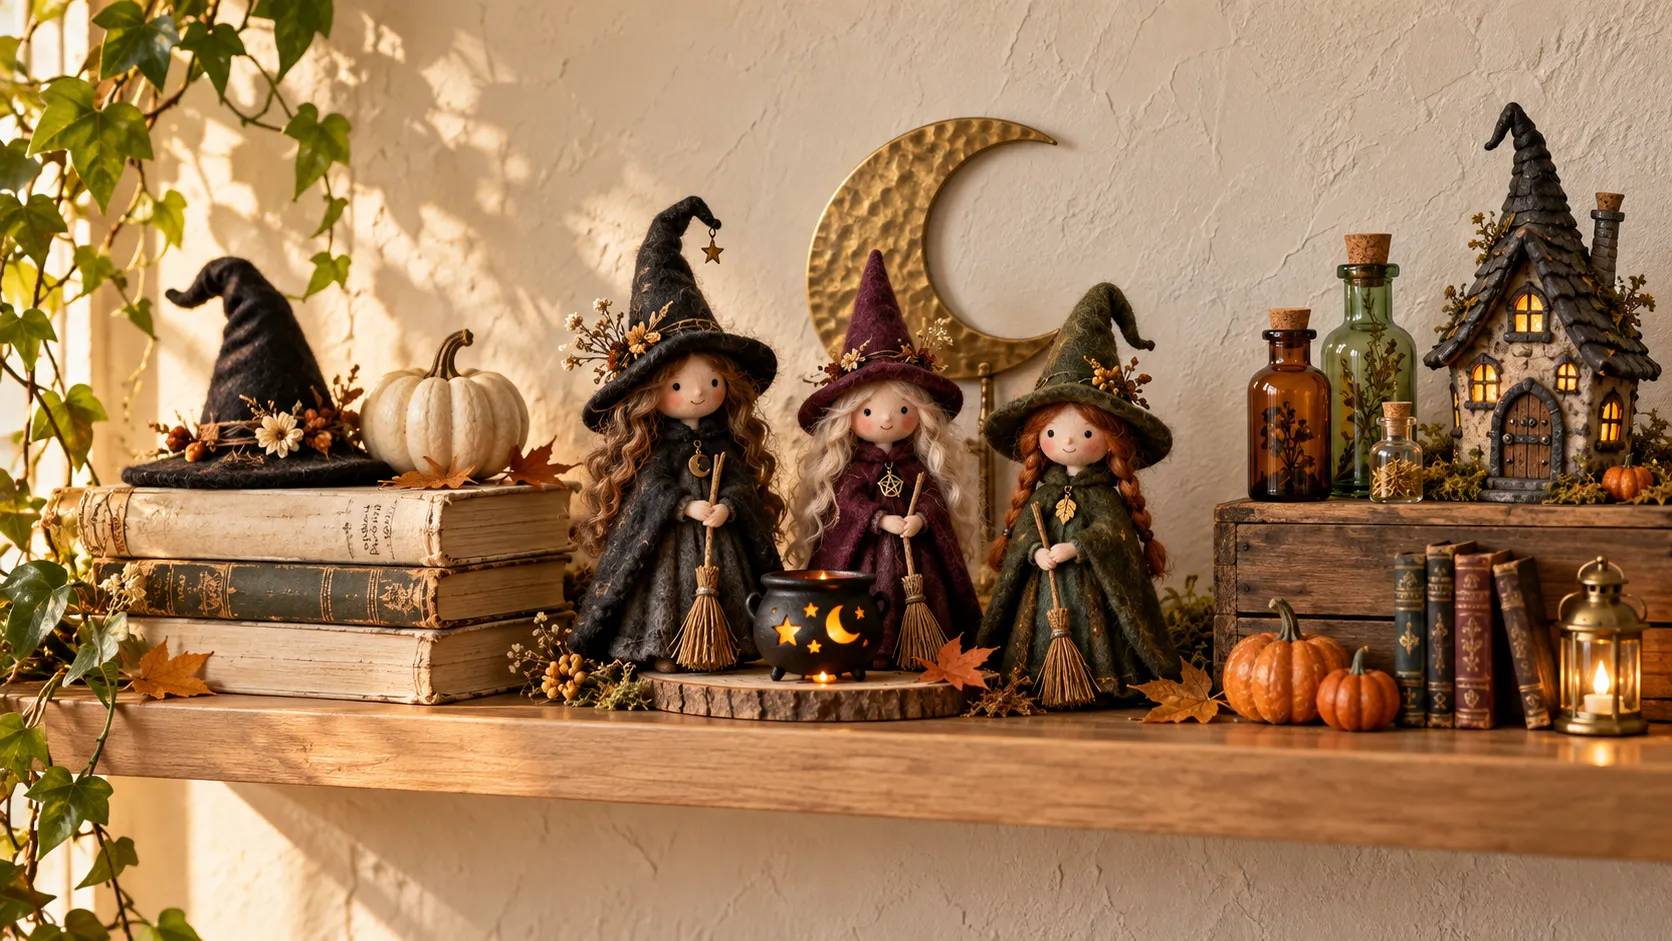
24 Mini Witch Decor Ideas for an Enchanting Shelf Look
Your shelf doesn’t need another oversized pumpkin to feel ready for Halloween. Sometimes, a tiny pointed hat and a crooked broom bring all the character you need.
These mini witch decor ideas help you create an enchanting display without crowding your books, plants, or everyday favorites. From teacup witch gardens to miniature spellbooks, you’ll find 24 ways to give small shelf spaces a playful seasonal touch.
Small ornaments can disappear beside taller objects, so placement matters just as much as the pieces you choose. These ideas include practical tips for balancing heights, keeping silhouettes visible, and grouping accessories neatly. Start with an empty corner, choose a few colors you love, and find a little witch scene that suits your home.
Witch Hat Book Stack
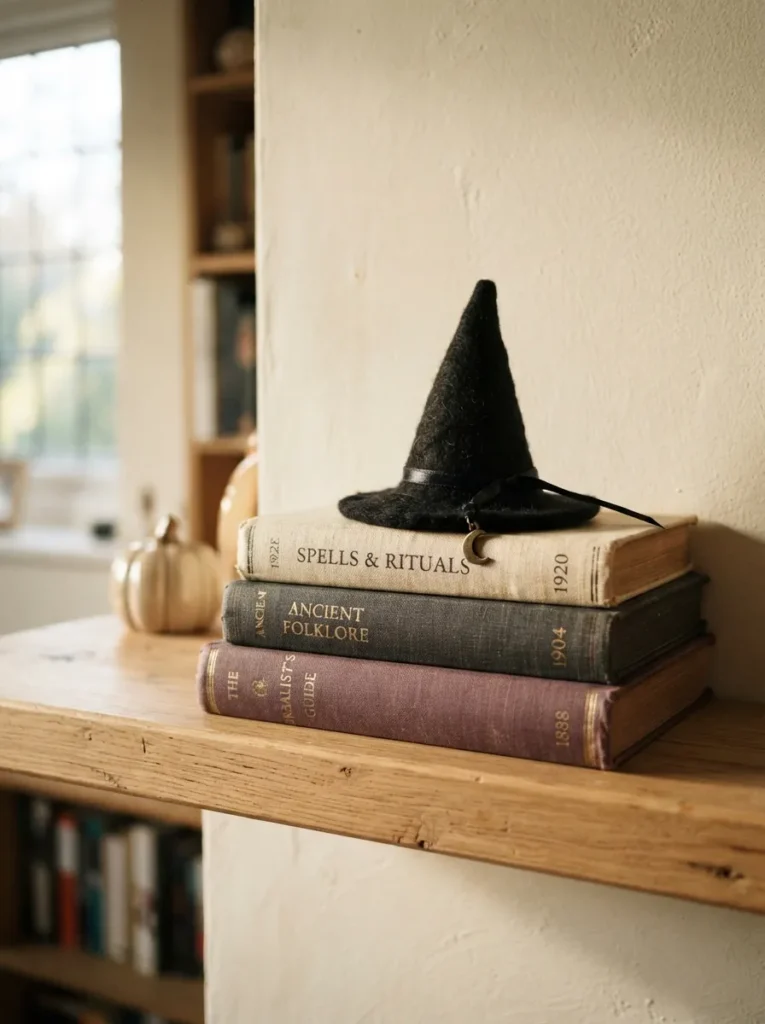
A tiny witch hat gives ordinary books an instant Halloween identity without taking over your shelf. Choose two or three small hardbacks, turn busy spines toward the wall, and place the largest book underneath. Keep the stack low enough that the pointed hat has breathing room above it.
For balanced mini witch decor, pair the stack with one smaller object, such as a brass star or ceramic pumpkin. Repeat a color already in your room so the display feels connected. Secure a lightweight hat with a removable adhesive dot compatible with the book’s cover material.
Mini Broomstick Bundle
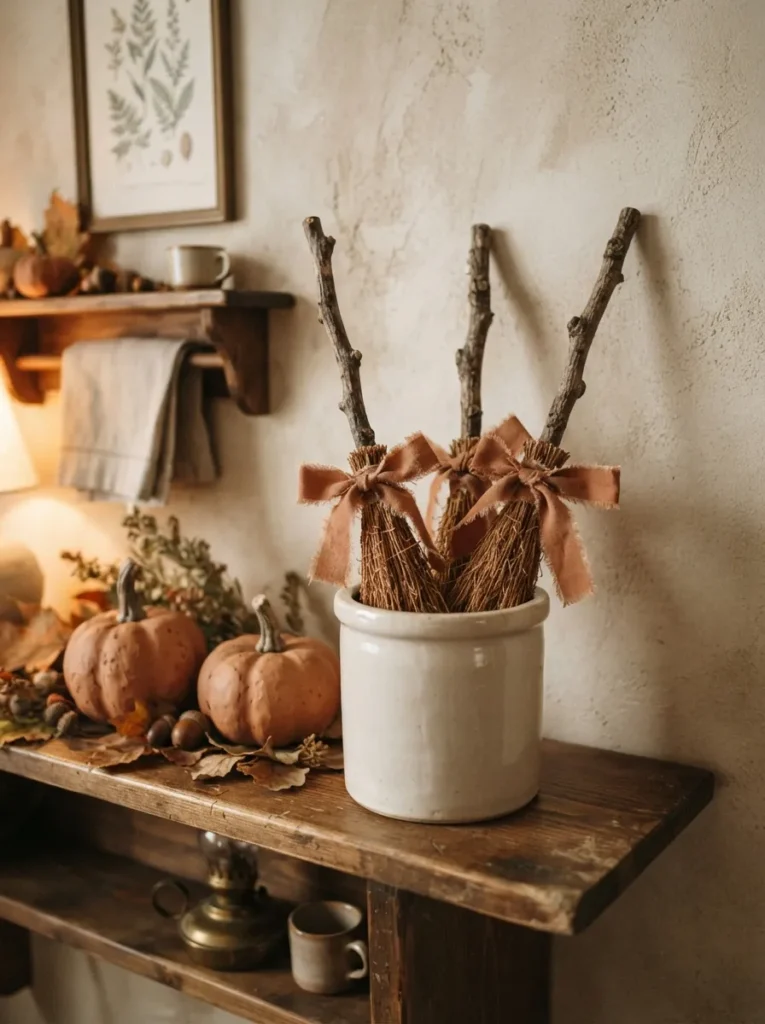
- Give an empty shelf corner a witchy detail with three tiny broomsticks in a cream crock. The pale container helps their dark handles stand out.
- Cut craft twigs to slightly different lengths, keeping the tallest below the shelf above. Varying heights makes each broom visible.
- Gather short raffia strands around each twig end and wrap them tightly with brown thread. Trim the bristles over a tray to catch loose pieces.
- Tie the handles loosely with cinnamon ribbon, then spread the bristles slightly. Keep the bundle inside the crock’s footprint so nothing hangs over the shelf edge.
The narrow shape suits shelves where a larger witch figurine would crowd nearby books. Leave a little open space beside the crock so the broom silhouettes remain readable. For a coordinated display, match the ribbon to one nearby pumpkin or book spine instead of introducing several new accent colors.
Also See : 20 Bat Shelf Sitter Ideas for a Mysterious Display
Witch Cauldron Glow

Quick Tip:
Let a glowing cauldron become the little detail that draws attention after sunset. Choose a shallow miniature pot and a battery tea light that fits without forcing it inside. Keep the switch accessible so you can turn it off without dismantling the arrangement.
Place the cauldron near the front of the shelf, safely back from the edge, with taller potion bottles behind it. An amber light softens the black finish and keeps the arrangement cozy. Skip cotton stuffing around the light; an open rim gives you a cleaner glow and easier battery access.
Tiny Witch Cottage

BEFORE: Small Halloween ornaments scattered across a shelf can disappear among everyday objects. A tiny house alone may look disconnected, especially beside much taller books.
AFTER: A shallow wooden coaster gives the witch cottage a clear boundary. A miniature broom beside the door and two clay mushrooms create a recognizable scene without filling the whole shelf.
Choose a cottage short enough to leave visible wall space above its roof. Position the mushrooms toward one front corner rather than spacing them evenly around the house. That small cluster keeps the doorway visible and makes the setup easier to lift when you need to dust underneath.
Miniature Spellbook Stand

- Turn a palm-sized notebook into the detail that makes your shelf feel like a witch’s study. Choose a lightweight booklet with flexible binding so it opens easily.
- Tint two visible pages with a pale brown colored pencil. Draw a crescent moon on one page and a simple botanical sketch on the other.
- Rest the booklet on a miniature easel with a supporting bottom ledge. Check that the stand stays steady with the pages open.
- Place a tiny witch hat beside the stand, slightly forward of its legs. Keep both objects clear of the shelf edge.
An upright book introduces height without needing a bulky stack, making it useful between low pumpkins or small jars. Keep the page designs bold enough to recognize from a few feet away. Fine lettering tends to disappear at this scale, while a moon and leafy sprig remain visually clear.
Witch Silhouette Frame

| Detail | Cut Paper Silhouette | Stamped Silhouette |
| Main materials | Black cardstock, ivory backing, scissors | Witch stamp, black ink, ivory cardstock |
| Visual finish | Solid shape with crisp edges | Softer edges with visible ink texture |
| Design control | Adjust the hat and profile before cutting | Repeat the same motif with one stamp |
| Best use | One distinctive framed centerpiece | Matching frames across several shelves |
A single witch profile gives a busy shelf a clear focal point. Choose a shape with a pointed hat and recognizable nose, then leave a generous ivory border around it. For a narrow ledge, use a lightweight frame with a stand that fits fully within the available depth.
Witch Hat Peg Rail
DO
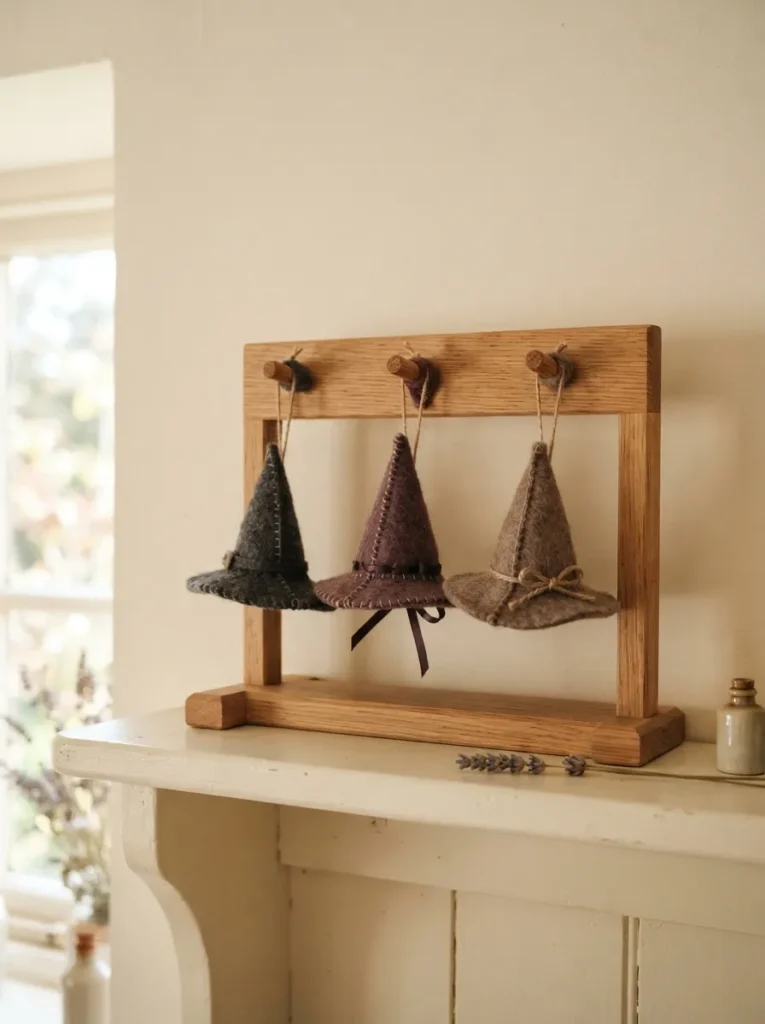
- Give tiny witch hats their own display by choosing a tabletop peg rail with a broad, steady base.
- Hang one lightweight hat per peg, leaving space between the brims.
- Repeat one shelf accent color in the hat ribbons.
- Position the rail against the wall with its base fully supported.
DON’T
- Overload the pegs with extra charms or heavy ornaments.
- Choose hats so large that they hide the wooden rail.
- Let trailing ribbons hang into candles or nearby lights.
- Place the stand where opening a cabinet door could knock it over.
The repeated pointed shapes create a clear witch theme without needing several figurines. Measure the space between pegs before making or buying your hats, since overlapping brims can hide their shape. On a short shelf, two well-spaced hats will read more clearly than four squeezed together in a row.
Teacup Witch Garden

Best For: A mismatched teacup waiting for a second purpose.
Materials: Teacup, fitted cardboard insert, preserved moss, tiny witch, clay mushrooms.
Skill Level: Beginner, with simple arranging and trimming.
Placement: A dry indoor shelf away from splashes.
Build the scene on a snug cardboard insert near the cup’s rim so the witch stays visible. Cover the insert with a thin layer of preserved moss, then tuck two mushrooms beside the figurine. Keep the handle turned outward; its curved shape is part of the display’s charm.
Striped Witch Legs
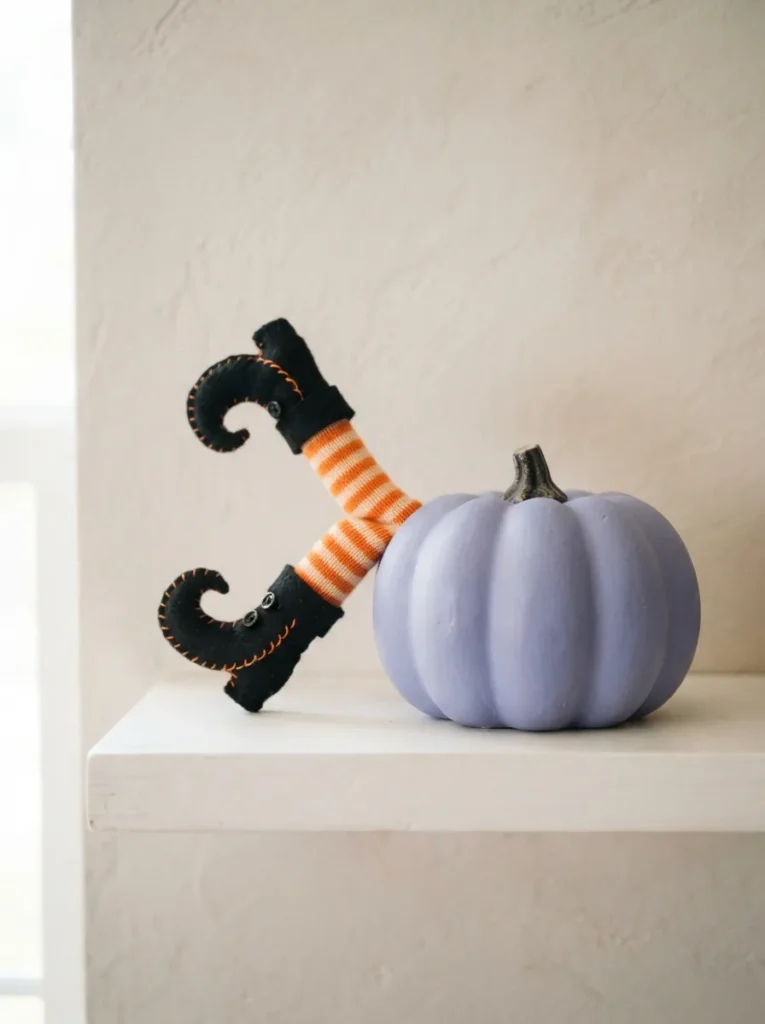
Who says a shelf witch needs to show her face? A pair of striped legs peeking from behind a small pumpkin adds a playful detail at the front of your display. Make the legs from narrow fabric tubes, fill lightly, and attach flat felt boots with curled toes.
Keep both legs resting on the shelf rather than dangling where they might catch on passing sleeves. Angle one boot slightly outward so the pose feels less stiff. A lavender or cream pumpkin lets orange stripes stand out, while a black pumpkin works better with pale stockings.
Witch Potion Crate

- Gather a tiny witch’s potion collection inside one wooden crate to keep scattered bottles looking intentional. Choose three short bottles that sit securely within its sides.
- Vary the bottle heights slightly, placing the tallest at the back. Leave each cork visible so the arrangement reads clearly from the front.
- Label the bottles with simple names such as “Moon Dust” or “Dried Sage.” Large handwritten letters suit the small scale better than crowded decorative text.
- Add a miniature hat to one bottle neck and leave the others plain. Empty colored bottles provide enough detail without messy liquid fillings.
The crate makes this mini witch decor easy to move when you rearrange your shelf. Choose a low-sided version so it frames the bottles without hiding their labels. Before buying supplies, cut a paper rectangle to the crate’s dimensions and check that it fits beside your existing decorations.
Witch Familiar Perch

Quick Tip:
Give a tiny witch’s familiar enough height to be noticed. Set the cat on a broad, flat pedestal slightly wider than its base, and check that all its feet remain supported. A pale pedestal helps a dark figurine stand out against darker shelf accessories.
Choose a cat with a visible tail or pointed ears so its outline stays recognizable beneath the hat. Place the broom alongside it at a low angle, keeping the face clear. This pairing works especially well on a shallow shelf because the witch theme comes through with just two objects.
Witch Cabinet Nook
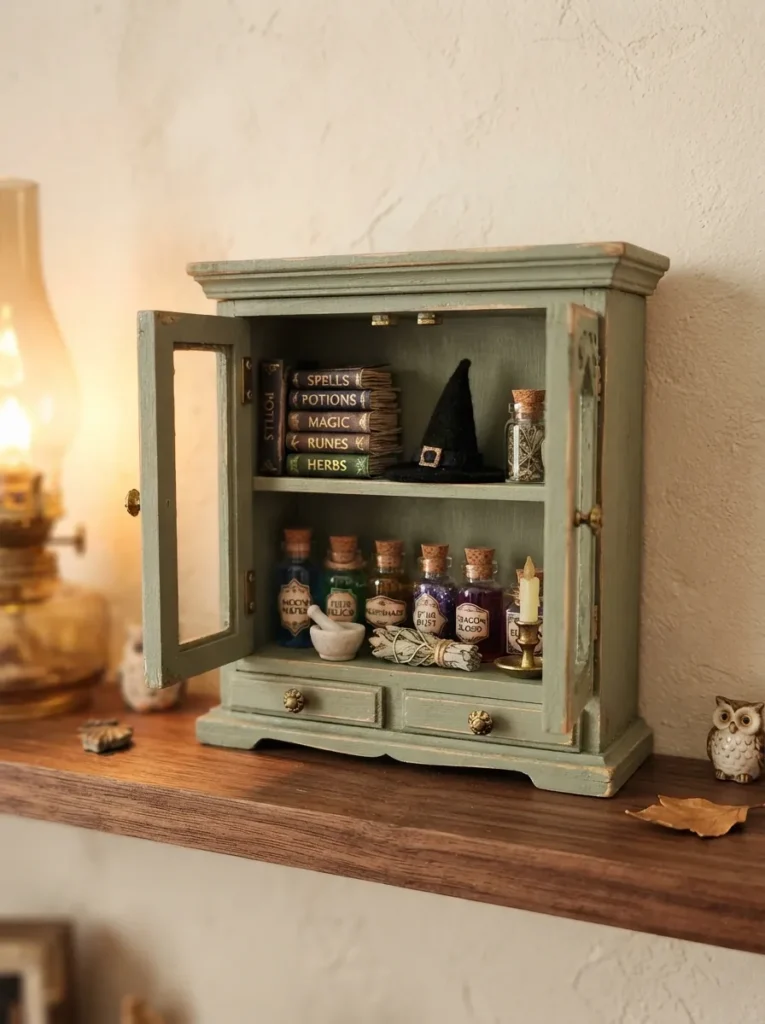
BEFORE: Tiny witch accessories can become visual clutter when lined up across a long shelf. Small spellbooks and jars may get lost between larger seasonal pieces.
AFTER: A dollhouse cabinet gives those accessories a defined home with several display levels. A pointed hat on the lower shelf makes the witch theme recognizable, while open compartments keep each piece visible.
Measure the cabinet’s interior before choosing accessories, especially the height beneath each shelf. Leave one compartment partly empty so the tiny collection does not look packed away. For a simple arrangement, place books below and lightweight jars above, then check that the cabinet stands steadily with its doors open.
Floating Witch Hat Garland
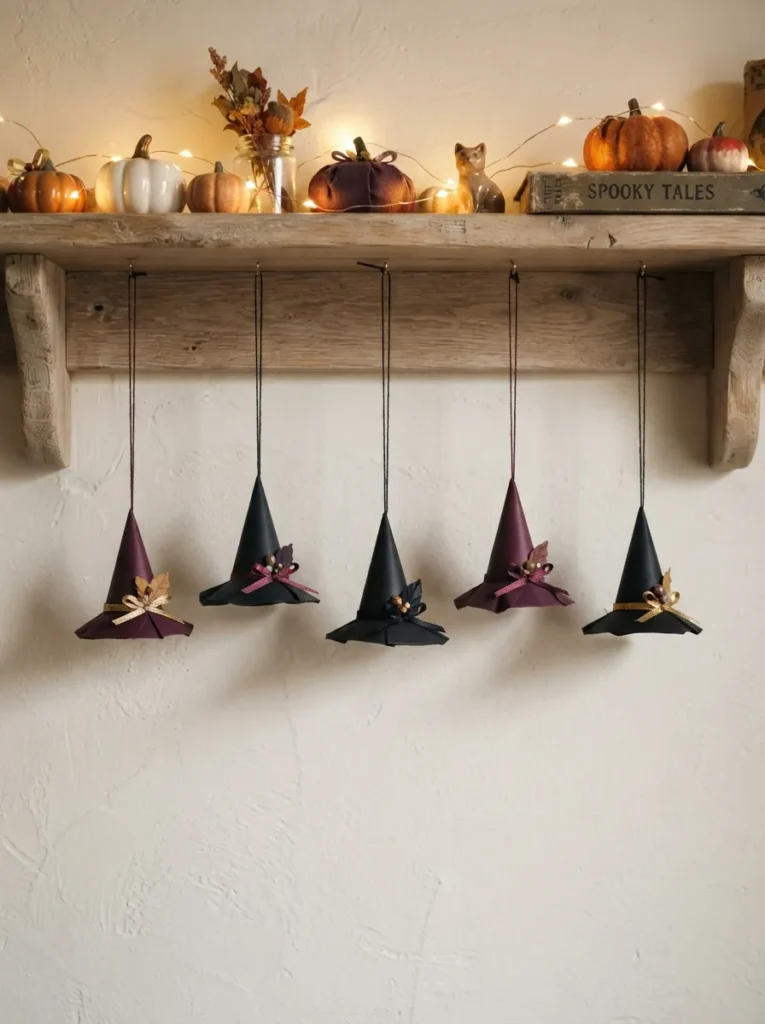
- Give the empty space beneath your shelf a playful row of miniature witch hats. Measure the shelf width and cut cotton thread slightly longer to allow a gentle dip.
- Cut five small semicircles from black and plum paper, then roll each into a cone. Glue the cones onto matching paper circles to form brims.
- Attach each hat to the main thread with a short hanging loop. Vary the loop lengths slightly while keeping the hats from touching.
- Secure the garland with removable hooks rated for your shelf’s finish. Keep the hanging shapes clear of drawers, doors, and frequently handled objects.
Paper hats weigh very little, making them practical for a delicate shelf garland. Keep each one small enough that the row supports the display above instead of hiding it. For a quieter look, use only black paper and repeat the same narrow cream ribbon around every hat base.
Witch Crystal Display

| Detail | Clear Glass Marble | Clear Acrylic Ball |
| Appearance | Crisp reflections with noticeable weight | Glossy surface with a lighter feel |
| Supporting base | Snug ring stand smaller than the marble | Shallow cup stand sized to the ball |
| Handling | Can chip or break if dropped | Less prone to shattering but can scratch |
| Shelf placement | Stable spot away from the edge | Stable spot away from frequent handling |
A tiny fortune-telling scene needs only a witch, a clear sphere, and a secure stand. Position the ball beside the figurine’s hands so the two pieces feel connected. Keep clear spheres out of direct sunlight, where concentrated light can create a hazard; nearby LED lighting supplies sparkle instead.
Cloaked Peg Doll Witches

DO
- Let three simple wooden dolls bring a handmade witch gathering to your shelf.
- Cut each felt cloak short enough that the doll’s flat base rests directly on the shelf.
- Use one shared detail, such as cream hatbands, to connect the different cloak colors.
- Arrange the dolls in a shallow triangle with every face visible.
DON’T
- Wrap thick fabric beneath the bases, where it can make the dolls wobble.
- Add so much hair that it hides the faces and cloak collars.
- Make hat brims wide enough to overlap neighboring dolls.
- Crowd the group with accessories that compete with their small silhouettes.
Wooden peg dolls offer a forgiving starting point because their rounded heads and flat bases already provide the basic figure. Sketch one cloak pattern on scrap paper before cutting your felt. Reusing that pattern keeps the group consistent, while different colors give each little witch her own character.
Witch Door Bookend

Result: A secret witch doorway tucked beside your everyday books.
Materials: Sturdy bookend, miniature craft door, crescent embellishment, tiny broom.
Skill Level: Beginner with basic gluing and painting.
Best For: A shelf that needs both book support and seasonal detail.
Attach the door to the outward-facing side of a bookend, keeping its supporting base clear. Let the adhesive cure according to its label before returning the books. The door creates a small architectural feature without taking over useful shelf space, especially when the broom stays within the bookend’s outline.
Witch Cloak Hanger
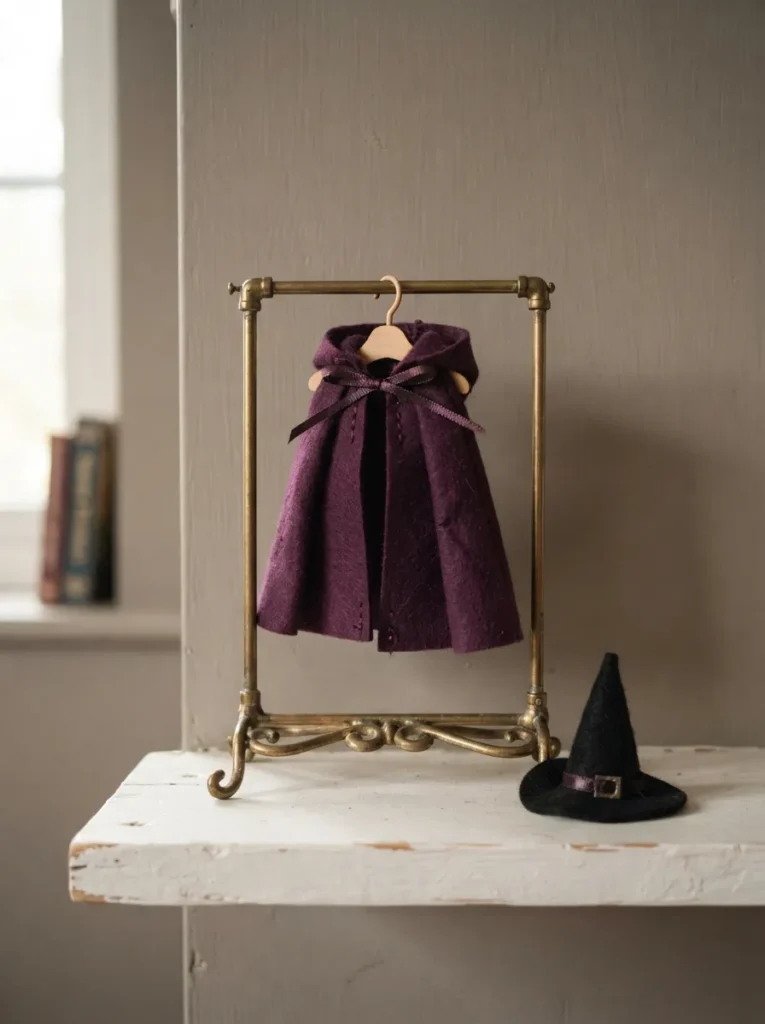
An empty miniature cloak can suggest a witch nearby without adding another figurine. Fold a small felt rectangle around a doll-sized hanger, then pinch the top into a loose collar. A narrow ribbon tied at the neck gives the fabric shape while leaving the lower edge open and flowing.
Set the hanger on a stable doll clothes rack, with the hem hovering just above its base. Keep the neighboring hat low so the cloak remains the tallest feature. For a compact shelf, choose a rack with one hanging bar and skip extra garments that would hide the silhouette.
Witch Moon Backdrop

- Frame a tiny witch with a crescent moon to make her pointed hat stand out. Choose a backdrop slightly taller and wider than the figurine.
- Paint a lightweight craft board charcoal, then add a gold paper crescent toward one upper corner. Leave the lower portion plain behind the witch.
- Support the board in a tabletop photo holder with a slot that fits its thickness. Check that the holder’s full base sits securely on the shelf.
- Place the witch in front of the crescent’s lower tip, with a small gap between figure and board. Keep additional ornaments outside the moon’s outline.
The backdrop helps a small figure remain visible against patterned wallpaper or a busy collection of books. Match the moon’s finish to nearby hardware for a connected look: muted gold beside brass, or soft silver beside chrome. A matte finish also reduces distracting reflections when you photograph the shelf.
Witch Boot Planters

Quick Tip:
Turn a pair of tiny witch boots into planters without bringing water onto your shelf. Choose hollow ornaments with flat soles and tuck a small piece of dry floral foam inside each opening. Insert short artificial stems, keeping the curled toes fully visible.
Keep the greenery lower than the boot shafts so the shapes remain easy to recognize. A few mossy sprigs suit the small openings better than full artificial succulents. Set one boot slightly behind the other, with both toes angled outward, to show their buckles and avoid a rigid paired arrangement.
Witch Apothecary Drawers

BEFORE: A miniature drawer chest can look like ordinary dollhouse furniture among Halloween decorations. Placing several potion jars on top may crowd its surface while leaving the witch theme unclear.
AFTER: One slightly open drawer becomes a display for a tiny pointed hat and parchment scroll. Two amber jars on top complete the apothecary setting while keeping the chest’s shape visible.
Choose a chest with drawers that stop securely, and open only one a short distance to reduce tipping. Tuck the parchment behind the hat rather than letting it trail over the handle. This arrangement suits deeper shelves where the extended drawer remains comfortably inside the front edge of the surface.
Witch Embroidery Hoop
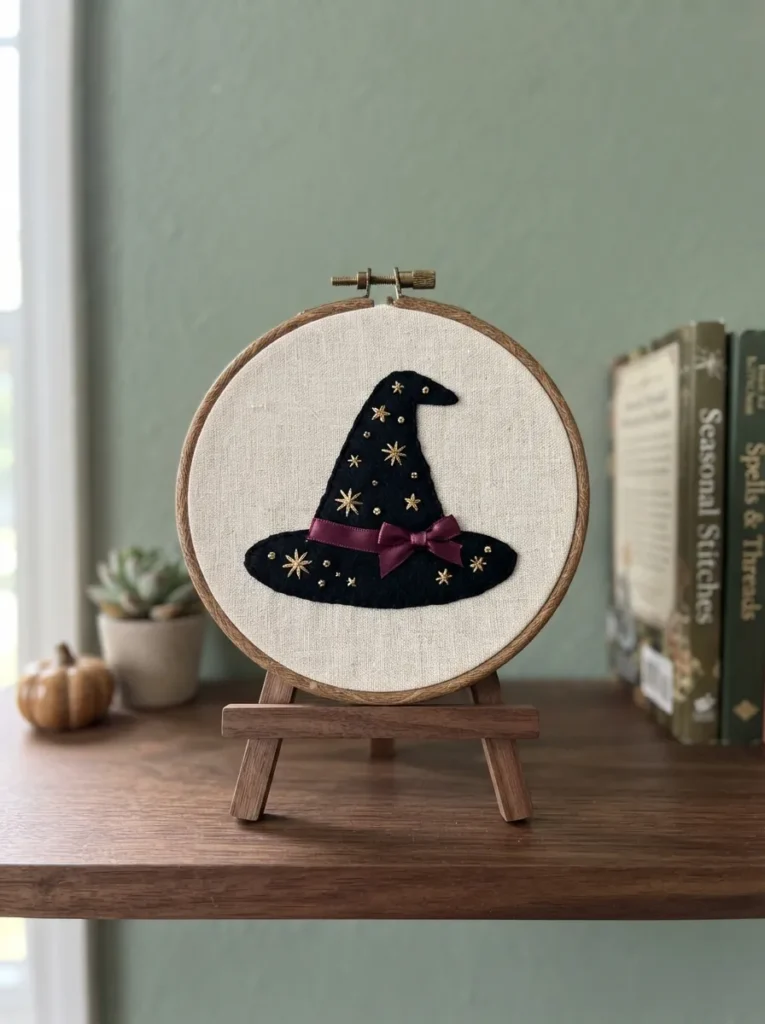
- Bring a softer texture to your witch display with a palm-sized embroidery hoop. Stretch plain ivory fabric inside and tighten the outer ring until the surface lies flat.
- Cut a pointed hat and wide brim from black felt. Position the shape slightly below the center, leaving room for a few stars above.
- Attach the felt with small stitches or fabric glue, following the adhesive’s drying instructions. Add a narrow plum ribbon across the hat’s base.
- Stitch three simple gold stars above the point, then trim and secure excess fabric behind the hoop. Rest it on a small easel that supports the bottom rim.
Fabric gives a shelf of glass jars and painted ornaments a softer visual break. Keep the hat large enough to recognize across the room, with the stars acting as small accents. For a beginner version, use adhesive felt stars and fabric glue instead of sewing the design by hand.
Witch Bell Jar
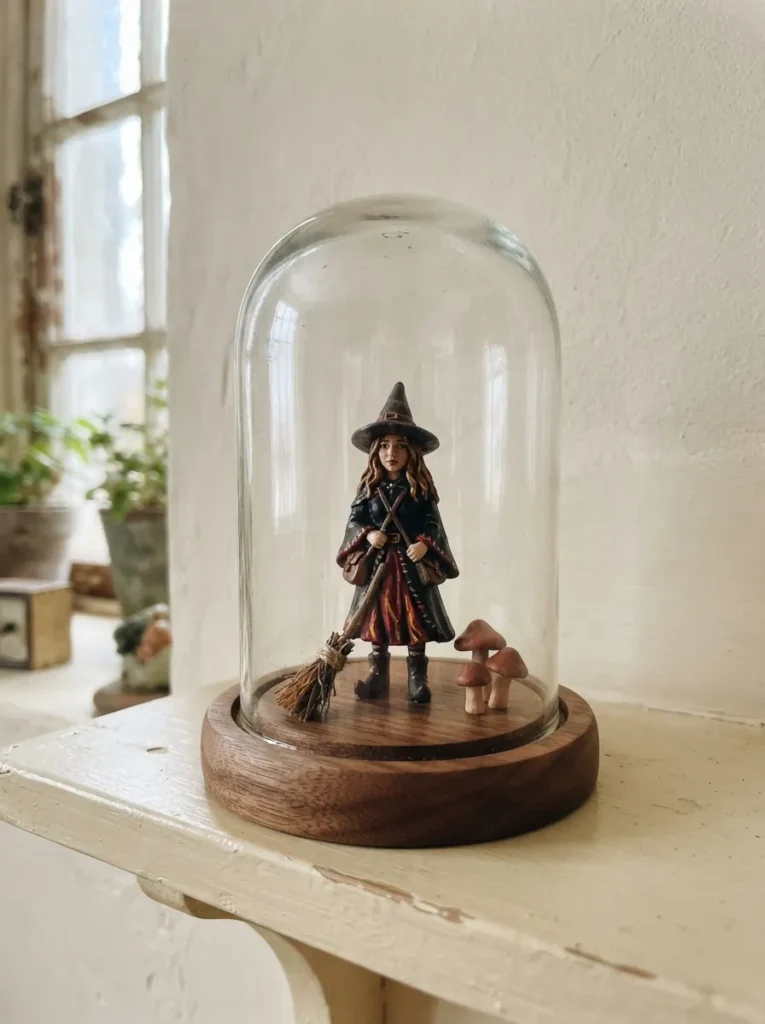
| Detail | Glass Bell Jar | Acrylic Display Dome |
| Visual effect | Clear reflections with a traditional display look | Similar enclosed look with less weight |
| Handling | Heavier and breakable if knocked | Lighter but more easily scratched |
| Cleaning | Wipe with a soft cloth suitable for glass | Use a soft cloth and an acrylic-safe cleaner |
| Best placement | A sturdy shelf away from busy edges | A stable shelf where lighter accessories suit the setup |
Give one tiny witch the attention of a collected keepsake by enclosing her beneath a dome. Measure the interior height before choosing the figurine, leaving space above her hat. Keep accessories below shoulder level so her face remains visible, and lift the display by its base rather than its cover.
Witch Herb Drying Rack
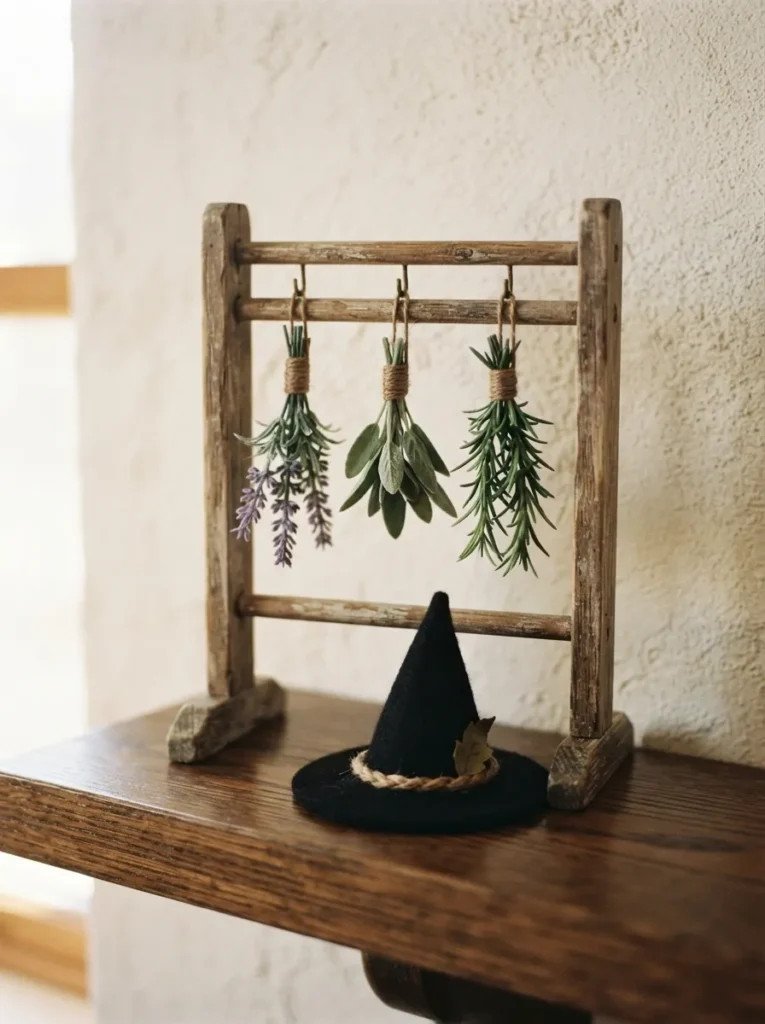
DO
- Bring a witch’s workroom to your shelf with three tiny herb bundles hung upside down.
- Choose short artificial sprigs with fine leaves that suit the miniature scale.
- Tie each bundle tightly with brown thread before attaching it to the crossbar.
- Place a small pointed hat beside the rack to make the witch theme clear.
DON’T
- Hang bunches so thick that they hide the rack’s frame.
- Let the stems extend beyond the shelf into a walkway.
- Cover the base with loose leaves that complicate dusting.
- Use a top-heavy rack that rocks when lightly touched.
A drying rack introduces an open shape between solid books and ceramic pieces. Keep the bundles separated so each outline remains visible against the wall. Artificial herbs avoid the shedding that dried stems can cause, making this setup easier to maintain on a shelf you use throughout the season.
Witch Shadow Box
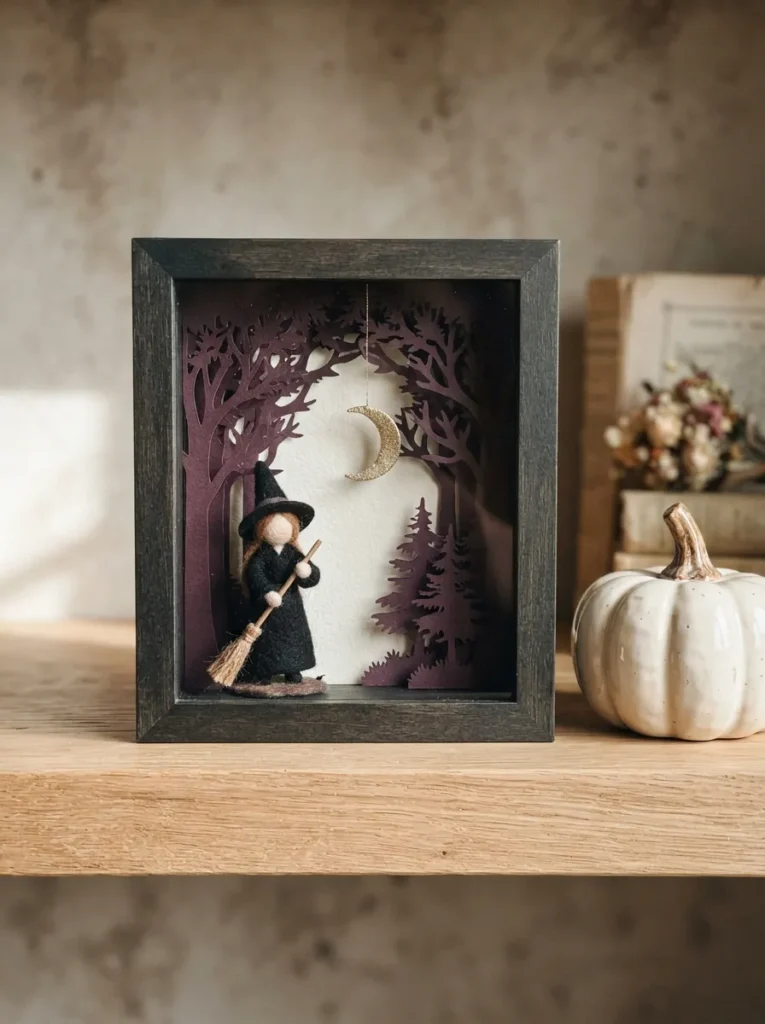
Result: A complete miniature witch scene contained within one frame.
Materials: Deep box frame, paper trees, felt witch, crescent cutout, adhesive spacers.
Skill Level: Beginner with careful cutting and layering.
Best For: A small shelf where loose accessories would feel crowded.
Build the background first, then bring the witch forward with adhesive spacers for a little depth. Leave clear space around her hat and broom so the silhouette stays readable. This contained approach to mini witch decor makes seasonal storage simpler because the entire scene stays together inside its frame.
CONCLUSION
A charming Halloween shelf starts with a few thoughtful details, not a shopping cart full of decorations. These mini witch decor ideas give you practical ways to combine tiny hats, spellbooks, brooms, and figurines while leaving your shelf usable and easy to enjoy.
Choose one setup that fits the space you already have, then build around its colors and shapes. Save this post on Pinterest so your favorite ideas are ready when decorating begins. Share the article with a friend who loves small seasonal projects, and give one little shelf corner its own enchanting witch scene to enjoy this fall.